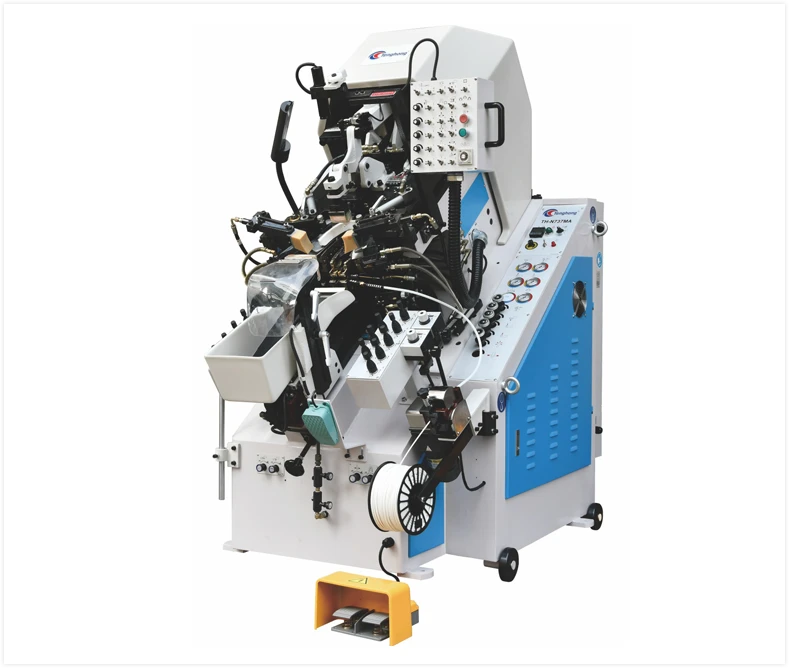
Proper calibration of a toe lasting machine requires balancing two mechanical forces: the tensile pull of the pincers stretching the shoe upper over the last, and the horizontal clearance of the wiping plates compressing the lasted margin against the insole. When pincer tension is too high, the upper tears or distorts the topline; when tension is insufficient or uneven, excess slack causes stubborn wrinkles around the toe feather line. Simultaneously, incorrect wiper height will either scuff the upper surface or fail to generate adequate bed pressure, leaving loose margins and weak adhesive bonds.
Achieving clean, flat toe lasting depends on material tensile limits, correct clamp engagement geometry, and synchronizing pincer release with wiper advance. This guide provides a direct, step-by-step procedure for calibrating pincer tension, setting wiper height relative to the insole plane, diagnosing lasting defects, and identifying when machine mechanical limits indicate a need for modern automated equipment.
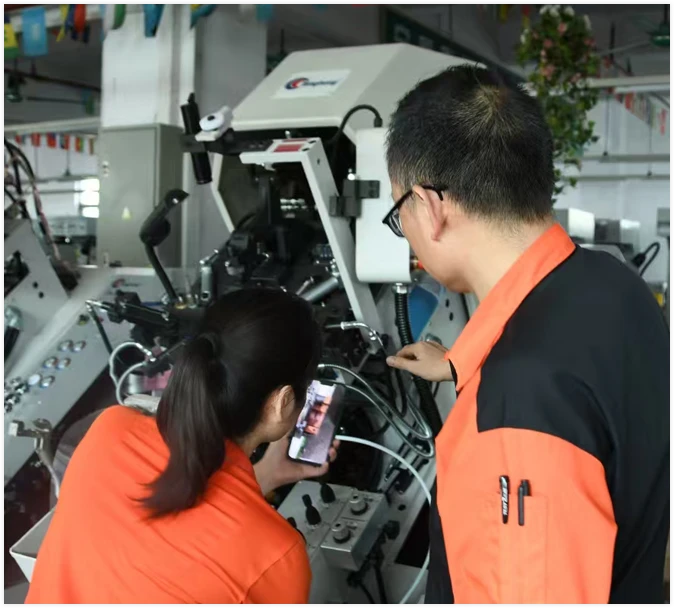
The Mechanics of Toe Lasting: Why Pincer Tension and Wiper Height Must Work in Sync
The toe lasting process transforms a two-dimensional stitched upper into a three-dimensional shape matching the contours of the shoe last. This cycle relies on a coordinated handoff between the gripping mechanism and the wiping mechanism across five distinct functional phases:
| Stage | Cycle Phase | Primary Mechanical Action | Critical Quality Objective |
| Phase 1 | Upper Clamping | Pincer jaws grip the lasting allowance margin evenly around the toe profile. | Prevent slippage and ensure balanced margin distribution without local pinching. |
| Phase 2 | Downward Tension Pull | Pincer carriage descends (or machine bed lowers) to draw material taut against the last. | Form the 3D contour over the toe ridge while keeping the center seam strictly aligned. |
| Phase 3 | Wiper Inward Stroke | Hot-melt adhesive injects as contoured wiper plates advance horizontally across the feather line. | Smooth the perimeter before margin release; maintain adhesive thermal workability. |
| Phase 4 | Pincer Release | Pincer jaws open at a calibrated microsecond mark during the inward wiper travel. | Avoid shearing the material against stationary clamps while preventing premature slack. |
| Phase 5 | Margin Consolidation | Wipers close completely and auxiliary vertical bed-up pressure beds the margin flat to the insole. | Achieve a thin, flat lasted margin with high initial green strength and zero pleating. |
If pincer tension drops before the wipers make contact with the feather edge, the material retracts, creating loose pleats. Conversely, if the pincers hold the margin too long after the wipers initiate their inward fold, the advancing wiper blades shear directly against the clamped material, leading to cut fibers or torn toe caps. Likewise, if wiper travel height is misaligned with the insole plane, even properly tensioned uppers will wrinkle or experience surface abrasion.
Step-by-Step Procedure to Calibrate Pincer Tension Across Different Materials
Pincer assemblies typically feature between 5 and 9 independently adjustable jaws arranged in an arc around the toe profile. Balancing these pincers requires an orderly setup sequence.
Step 1: Baseline Inspection and Clamp Alignment
Before adjusting system pressure:
- Check each pincer jaw for worn serrations, residual dried adhesive, or leather debris that causes slippage.
- Verify that the pincer jaws close squarely. A skewed jaw concentrates clamping force on a single point, cutting the margin under light pulling tension.
- Position the toe pincers so the front center clamp aligns symmetrically with the last center seam, and lateral pincers follow the natural curvature of the toe feather line.
Step 2: Setting Multi-Stage Pulling Tension
Most industrial machines utilize two-stage tensioning: initial gripping pressure (clamping the edge) and drawing/pulling tension (the downward or inward stroke).
- Set the initial clamping pressure just high enough to prevent the material from slipping out during the pull.
- Adjust the main pulling stroke tension. Start at a low baseline pressure on your machine’s regulator or digital interface.
- Engage the dry cycle (without adhesive) on a test last. Observe the center seam of the upper: if the seam migrates to the left or right, loosen the tension on the side pulling harder until the seam aligns dead-center along the last ridge.
- Set lateral pincers to slightly lower pulling tension than the center pincer to avoid over-stretching the vamp wings.
Step 3: Material-Specific Pressure Balancing
Tensile strength and elongation vary drastically across footwear uppers. Adjust tension parameters based on material characteristics:
- Heavy Full-Grain Leather: Requires higher downward pulling tension to shape the stiff fibers around the last edge. Clamping grip must be firm to prevent pull-out.
- Soft Nappa or Suede: Demands moderate tension with smooth jaw surfaces to prevent surface embossing or grain cracking.
- Engineered Mesh and Knitted Uppers: Features high elongation along directional knit lines. Requires lower initial pulling tension but balanced travel distance; excessive clamp pressure easily shears individual synthetic yarns.
- Synthetic PU / Microfiber: Offers low mechanical stretch compared to genuine leather. High tension will cause abrupt shear failure at the lasting allowance line; requires moderate, uniform pulling force across all pincers.
Note: Specific hydraulic or pneumatic pressure settings vary depending on machine brand, cylinder bore size, and material thickness. Technicians should consult the machine’s operation manual for manufacturer-recommended starting pressures and refine them through test lasting.
Precise Wiper Height and Clearance Adjustment: Preventing Upper Scuffing and Insole Gaps
The wiper assembly consists of two contoured steel plates that converge to fold the upper over the insole. Its vertical position determines the flatness of the lasted margin.
| Position Relative to Insole Datum | Mechanical Clearance | Resulting Lasting Condition | Operational Risk |
| Target Setting (Optimal) | Flush to 0.2–0.5 mm clearance | Wipers slide smoothly over the feather line; compresses margin firmly against insole. | Uniform adhesive spread, sharp feather line, zero surface damage. |
| Too Low (Negative Clearance) | Intersecting last shoulder | Wiper blades gouge into the last or drag excessively across the upper surface. | Scuffed grain, torn upper material, mechanical jamming or blade chipping. |
| Too High (Excessive Clearance) | Greater than material thickness | Wipers fail to press the folded margin down to the insole surface plane. | Loose pleats, thick hollow toe edge, premature adhesive detachment (gap formation). |
Establishing the Zero-Clearance Reference Point
- Mount the last fitted with an insole onto the machine’s support pin.
- Manually or jog-mode advance the wiper plates to their fully closed forward position without an upper mounted.
- Observe the vertical clearance between the bottom surface of the wipers and the surface of the insole.
- Adjust the wiper vertical head height so the wiper plates sit flush against the insole surface. The ideal clearance should accommodate exactly the compressed thickness of the lasted upper margin—typically flush to within a fractional millimeter of the insole edge.
- If the wipers sit too low, they strike the shoulder of the last, causing mechanical stalling or cutting into the leather. If set too high, the wipers ride over the material without flattening the pleats, resulting in a rounded, hollow toe edge.
Synchronizing Inward Wiper Travel with Pincer Release Timing
Once physical height is established, configure the release switch or timer:
- The pincers should begin opening just as the wiper edges cross the feather edge and secure the material against the last bottom.
- If the upper exhibits “drag tears” parallel to the feather line, delay the wiper forward speed or advance the pincer release timing.
- If the lasting margin slips out before the wipers support it, delay the pincer release signal by fractions of a second until the wiper stroke catches the tensioned margin securely.
Troubleshooting Common Toe Lasting Defects: Symptom, Root Cause, and Correction
Use the following diagnostic matrix to identify and correct lasting issues on the production floor:
| Defect Symptom | Primary Root Cause | Mechanical Adjustment Action |
| Tearing along the toe cap seam or margin | Pincer pulling tension excessive; or pincers releasing too late during wiper stroke. | Reduce hydraulic/pneumatic pulling pressure on affected pincers. Advance pincer release timing so jaws open as wipers engage the margin. |
| Crow’s feet / heavy wrinkles around the toe feather line | Uneven or insufficient pincer tension; wiper travel height positioned too high. | Increase pulling tension on lateral pincers. Lower wiper height to compress the margin firmly against the insole. Check for uniform jaw grip. |
| Upper scuffing or abrasion marks near feather line | Wiper plates set too low; rough or burred wiper edges; excessive wiper forward drive pressure. | Raise wiper carriage slightly to clear the last shoulder. Polish wiper contact edges. Reduce horizontal wiper forward thrust pressure. |
| Asymmetrical vamp or crooked center seam | Lateral pincers delivering uneven tension across medial and lateral sides. | Rebalance pincer regulator valves: decrease tension on the pulling side or increase tension on the loose side until the seam runs true. |
| Gaps between lasted margin and insole (poor bonding) | Insufficient vertical bedding pressure; delayed wiping stroke allowing adhesive to chill; wiper height too high. | Lower wiper height for firmer compression. Increase auxiliary bed-up pressing force and dwell time. Verify adhesive application temperature and timing. |
| Material slipping from pincers during pull | Pincer jaw clamping pressure insufficient; adhesive or oil contamination on jaw teeth; worn jaw teeth. | Clean pincer teeth with a wire brush. Increase initial clamping pressure. Replace worn pincer jaw inserts. |
When Manual Calibration Isn’t Enough: Equipment Capabilities That Impact Consistency
On older mechanical or purely hydraulic setups, fine-tuning pincer tension and wiper height can become a continuous struggle. Operating adjustments often drift as oil temperatures rise, seals wear, or incoming leather batches vary in thickness and temper.
If operators find themselves constantly recalibrating mechanical stops between shifts, the issue is often related to machine design limitations rather than operator error:
- Independent Multi-Axis Pincer Control: Entry-level or aging equipment often controls pincer movement through gang-tied linkages, forcing identical stroke lengths on areas requiring varied tension. Modern automated systems utilize independently programmable pincers that adjust pulling angle, stroke distance, and pressure on a per-clamp basis.
- Digital Wiper Positioning: Manually turning mechanical stop-screws to set wiper height creates variations across left and right shoe pairs. Modern machinery incorporates digital position presets and servo-driven wipers that automatically adjust clearance according to stored shoe last profiles.
- Integrated Temperature and Flow Management: Thermal variation in hydraulic fluid changes wiper stroke speeds throughout an 8-hour shift. Consistent lasting lines rely on machines engineered with proportional valves or electronic servo systems to keep wiper travel and pincer release timing synchronized.
For factories running complex footwear geometries, athletic knits, or premium dress shoes, upgrading to a high-precision automatic toe lasting machine provides the repeatable pressure regulation, programmable wiper trajectories, and rapid shoe-size changeovers that manual adjustments cannot deliver.
Frequently Asked Questions About Toe Lasting Calibration
How often should pincer pressure and wiper alignment be re-calibrated?
A complete baseline calibration should be performed whenever switching to a new shoe last style, changing upper materials (such as moving from natural calfskin to synthetic mesh), or after conducting scheduled mechanical maintenance. In continuous mass production runs using the same last and material, operators should inspect wiper zero-clearance and pincer gripping surfaces at the start of every shift.
What is the main cause of toe cap tearing on synthetic materials?
Synthetic leathers and microfibers possess a defined tensile yield point with minimal elasticity compared to natural hides. Tearing is most commonly caused by excessive pulling stroke distance combined with sharp, deeply serrated pincer teeth. Switching to finely knurled pincer teeth and utilizing a two-stage pulling cycle with lower final tension will generally resolve tearing on synthetics.
Can wiper height be adjusted without stopping the automated production cycle?
On conventional machines with manual screw stops, adjusting wiper height requires halting the machine and running dry cycles to verify clearances safely. However, modern computerized machines equipped with digital interface controls permit fine vertical micro-adjustments via touchscreen while setting up the next pair, eliminating manual mechanical interventions.
Why does the lasting margin lift after the wipers retract?
This problem typically indicates that the adhesive has set prematurely before the wipers reached full extension, or that the auxiliary bedding pressure and dwell time were insufficient to set the bond. Verify adhesive melt temperatures, lower wiper clearance slightly to increase downward squeeze, and ensure the bottom bed press holds the margin firmly until the adhesive achieves green strength.
Key Takeaways
- Synchronize Cycle Timing: High-yield lasting requires exact coordination between pincer release and wiper advancement across the feather edge.
- Align Wipers to the Insole Plane: Wiper vertical positioning must strictly match the insole plane, accounting only for the compressed thickness of the lasted upper margin.
- Tune Parameters to Material Stretch: Adapt clamping pressure and stroke depth to upper elasticity: natural grain hides require firm downward draw, whereas synthetic microfibers and knits need reduced tension and smooth pincer teeth.
- Maintain True Seam Symmetry: Always run dry cycles to verify that medial and lateral pincer pulling forces keep the center seam straight before applying hot-melt adhesive.
- Address Hardware Limitations: Persistent parameter drift across shifts often signals hydraulic oil thermal decay or mechanical link wear, pointing to the need for digital, servo-driven machinery.